Tips n tricks

Go Fishing Guides for Sydney

go fishing guide.png

Some light reading if you’re looking for something to pass some time in lockdown!

 Attached are the 4 Go Fishing Guides for the Sydney area.

This includes Botany Bay, Sydney Harbour, Middle Harbour and Parramatta/Lane Cove.

To quote the guides;

This series of guides to popular fishing locations is a great example of the proactive approach by the NSW Government to promote recreational fishing.

With much thanks to Sophie Johns. Fisheries Education Officer, Fisheries & Aquaculture Management

How to smoke fish

by Dave Rae

With thanks to Fishing World online http://www.fishingworld.com.au/how-to/how-to-smoke-fish

IN times past, smoking the catch was popular amongst many Australian anglers, particularly those beach fishos targeting tailor. These days however, it seems much less common to smoke your own fish, even though the popularity of smoked fish is on the rise. In contrast, smoked trout that was once only available from trout farms and niche outlets is now carried in many seafood shops and larger supermarket chains. Similarly, commercial smokehouses have emerged across the country, selling a range of species including smoked tuna and kingfish. Smoked fish is now widely regarded as a delicacy and Australian consumers are willing to pay premium prices for well-smoked fish.

Fortunately, it's not difficult to smoke fish provided a few simple steps are adhered too, and in some cases it’s possible to secure a great meal over a campfire. For example, on a trip to the South Island of NZ, in which extreme weather closed our chosen walking track and took out some huts that we were to shelter in, we rented a shearer’s hut beside a lake.

tailor5.jpg

Whilst the girls spent New Year’s inside near the fire, we walked through a sheep paddocks to fish the lakeshore and one evening, in the midst of climatic chaos (40 kt wind), we managed one of the holidays best memories. A mate and I found shelter from the wind in a tiny cove that was protected by a pile of fallen trees and we were able to catch trout and salmon at will by casting Tassie Devils into the maelstrom. Unexpectedly, the girls turned up with camp chairs, rugs and bubbly and we became catch and cookers, varying lure colour to suit the order. With a small fire set in beside a log and by making a little "chimney" from sodden bark, we smoked whole fish and delivered said fish to princesses on a bark plate. Maybe the wind and drizzle helped, but we were happy little campers as we hunkered down and tucked in!

Home smoking is far easier if you do it correctly, but before we delve into the "how-to", a little more background will make the journey easier. First up, as a titbit of irrelevant information, my limited research on the origin of smoking fish suggests that the process may have originated when man cooked meat in caves, which lacking chimneys, resulted in smoke-flavoured meals. An alternative thought being that purposeful smoking was used in the Middle East about 5500 years ago, with the aim of using smoke to preserve fish, probably as a tasty alternative to heavily salted and dried fish.

So, first off, to state the obvious, smoking is the process of flavouring and/or cooking a meat by exposing it to smoke from burning or smouldering material, most often wood. Whilst there are a variety of methods and processes that will give fish a smoky flavour, the two that are most pertinent are cold and hot smoking.

Slimey mackerel fillets ready for smoking.

Cold vs hot smoking
Cold smoking is popular around the world because of the ability to create variation within a very high-quality product, but it comes with some risk and must be approached correctly.

Typically, cold-smoking involves placing the fish (or other meat) in an unheated chamber while smoke from another chamber is pumped in. Initially, the fish is placed into the unheated chamber prior to smoking to allow a pellicle to develop (explanation follows) before introducing cold smoke, typically between 15-25°C. Time in the smoke is determined by the desired flavour as the longer the exposure the deeper the flavour, so some experimentation is required to best suit preferences. Because cold-smoking is conducted at low temperatures, there is a risk of bacterial and parasitic infection because the temperatures at which fish are cold-smoked are ideal for bacterial growth and not hot enough to kill parasites. Therefore, to eliminate risk, fish must be cured in salt before smoking or cooked after, at temperatures in excess of 60°C. Many smokers do both to be on the safe side!

The alternative smoking method is hot-smoking, which is easier and safer than cold-smoking because hot-smoking cooks fish at higher temperatures (+100°C), killing pathogens and bacteria. We will focus on hot-smoking from this point.

Hot-smoked fish is usually eaten hot, immediately after it has been smoked, although with refrigeration, hot-smoked fish tastes great the next day ... if you are able to retain any that is.

Typically, hot-smoking involves using the same chamber for both the fish and the smouldering material, meaning that the smoke is hot enough to cook the fish whilst flavouring it. Whilst fish can be smoked inside in the oven, the smell, likelihood of setting off smoke alarms and the possibility of carbon monoxide build-up should indicate that hot-smoking best takes place outdoors in a well-ventilated location. In my house, we often invite friends over to share and the boys locate to the back veranda with a refreshment of two, and enjoy the process, whilst the girls enjoy a wine and a chat away from the kitchen. Hot smokers are readily available from tackle stores, ranging from $50 up to $200. I use the affordable Jarvis Walker and it’s great, even after blowing out of the ute on the way back from a beach fish and cook session! It is heated by methylated spirit burner that’s placed under the box, and one load is usually sufficient. Hot beads are a popular heat source as the cook time can be reasonably well replicated by the number of beads used and the spread of the beads under the cooker ensures even heat over the whole tray.

The process
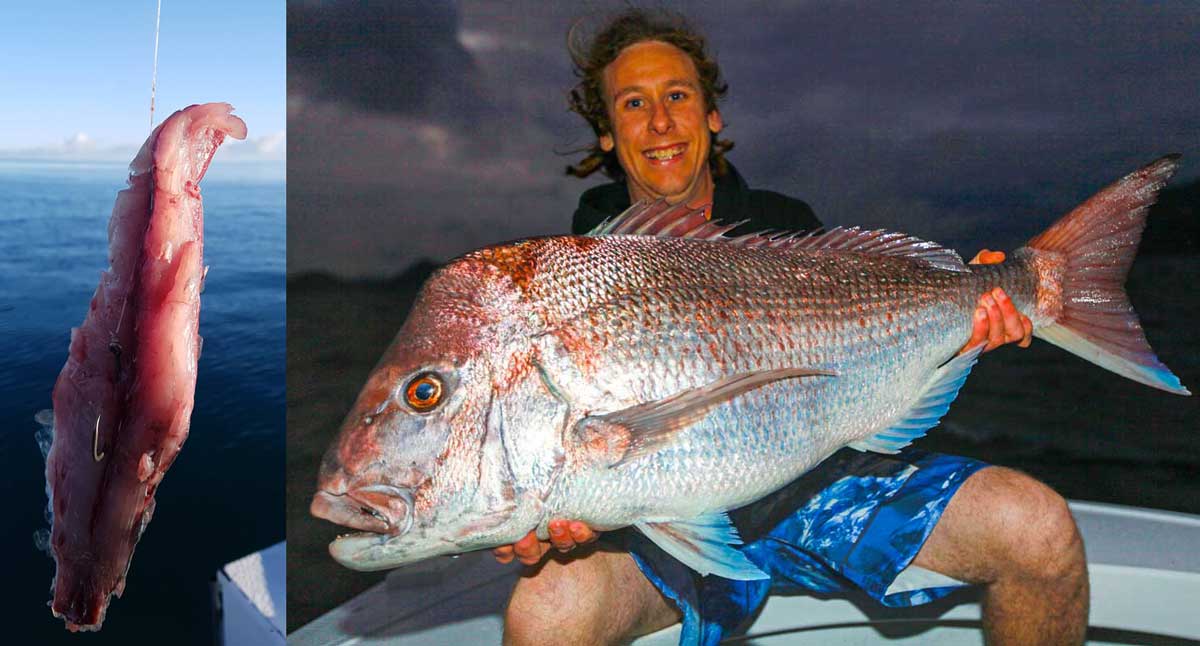
Whilst any fish species can in theory be hot-smoked, species with a high oil content smoke the best. Popular smoking candidates include trout, mullet, tailor, bonito, kingfish, slimy mackerel, spotted and Spanish mackerel, yellowfin, longtail and bluefin tuna. Trout, tailor, bonito, trevally and slimy mackerel can be smoked whole whilst larger species are usually smoked as cutlets or slices. When smoking fillets, particularly softer flesh species, a day in the fridge will firm the flesh prior to filleting.

Take care of your fish if intending to smoke it. Ike jime, bleed and place on ice if possible, easy in a boat but harder on the rocks. Transport all fish home whole and in an ice slurry to minimise damage. For fish that will be smoked whole, retain scales and clean carefully, being certain to remove all blood from the gut cavity. Chilled fish fillet best, so if the fish need it, give them an hour or two in the fridge or freezer prior to filleting. Fillets with the scales and skin offer another added taste or a base from which flesh is easily removed.

Brine
It's essential that fish are brined (cured) before smoking. Correct brining maximises taste, limits health risks and it takes time. It cannot be skipped or rushed!
Brines vary in composition according to the situation but almost universally contain a mixture of salt and sugar, with or without a liquid (usually water). Brine serves to both preserve the fish and to prepare it for cooking. Salt denatures the proteins, which enables the flesh to hold more moisture whilst sugar being a water attractor, adds further moisture and sweetness. Both are also preservatives, extending the storage life and freshness of the end product.

Dry brines add flavour and silkiness whilst wet brines add moisture and separates muscle fibres to improve smoke access. The time required to correctly brine a fish varies but in most instances 4 - 8 h is required for a wet treatment whilst dry brines can be fairly quick to act. Wet brines are solutions into which the fillets are soaked. They are the preferred curing technique for fillets because dry salt treatments make fillets overly salty. Whole fish respond well to dry salt and are best coated inside and out with pure salt. Whichever brine you use, it's important to prevent contamination by placing the fish in the fridge.

Personally, I only smoke fillets and cutlets, never whole fish. Most of my brines are wet brines of salt, sugar and water. With very oily species such as tuna and slimey mackerel, I use a 1:1 mix and soak them for 1 - 4 h depending on the size of the fillets. Mackerel are one of our favourites and we use 15 mm thick cutlets or skin-on tail fillets in a 2 salt: 8bwn sugar brine for 4 h. Wet brines should be washed off fillets, which are then dried prior to smoking. Tailor take at least 4 h to wet brine correctly, although I used a brown sugar dry brine on the flesh sides of the fillets from the last tailor I snagged (school jew bycatch) and it was really nice, although perhaps little too sweet. I let the fillets "rest" until the sugar glazed over (15 - 30 min) and then smoked it.

Thinking outside the box takes longtail tuna from just being a sportfish to a prime eater ... think sashimi and smoking.

Smoking
In order to maximise smoke (and limit combustion), the wood material should be dampened with water at least 30 min prior to smoking. One way to do this is to lay the wood particles out on a pan or dish and spray with water until handfuls retain their shape without becoming soaked. Traditionally hickory was the timber used but Australian timbers are in my opinion, just as good. Rosewood, brush box and a variety of gums are available from tackle store for about $10 each. Because I have a few acres of timber on my property, with a variety of trees, I have experimented, using a wide dish to collect the dust from both chainsaw and handsaw. Banksia is our favourite for a strong smoke taste whilst Casuarina (she-oak) gives a milder flavour. Be warned though... Never ever smoke fish using treated timber. Treatments are toxic in order to kill white ants and can contain (or should), cyanides, copper or arsenic!

To smoke we use a simple method involving laying sheet of aluminium foil on the inside base, adding a handful of wood dust and then the racks of evenly spread fish (for smoke movement). The lid goes on and the filled metho burner is ignited before centrally locating the smoke box over the burner. Then we take a seat nearby and enjoy a beverage whilst the smoke works its magic. In windy conditions we shelter the flame and keep an eye on it in case it’s blown out. 15 min later, the fish id plated and the feast begins.

Advanced techniques
Flavours can be enhanced to tastes with the addition of herbs, spices and condiments such as soy sauce. Fennel, rosemary, cumin, thyme, basil, bay leaves and citrus peels are particularly worth a try, as are aromatic teas. Although basic smoked fish is in my opinion as good as it gets.

Another favourite of ours in smoked baby octopus, which comes in many seafood dishes around the country. After 4 h in a 50:50 salt and sugar brine we smoke it, but it takes twice as long to cook as fish.

Basic brine mixtures

Equal parts sugar and salt to saturate the volume of water required to submerge the fish.

¼ cup salt: 1/3 rd cup sugar, 4 cups liquid (which can be water or a mixture of water/soy sauce and/or white wine)

4 tablespoons of salt per 4 cups of water.

1 cup warm water, 1 cup soy sauce, 3/4 cup brown sugar, ¼ cup sea salt, 3/4. tablespoon granulated garlic.

Hot-smoked tailor fillets, ready for the plate!

In closing
I hope you now have an insight into the process of hot-smoking fish at home. If you’re keen, check out your local tackle store for a smoker and smoking wood particles. Avoid shortcuts and have a go. Sitting under the back verandah with a few mates and a beer is a great way to spend some time... just remember to brine before they arrive. And by the way, this smoking deal is a brownie point bonanza!

Reel Handy: DIY fishing reel maintenance

Mark Frendin shows us how to maintain our reels for trouble free fishing.

With thanks to Fishing World online. http://www.fishingworld.com.au/how-to/reel-handy-diy-fishing-reel-maintenance 

REEL maintenance is one of those essential chores needed for prolonging the life of your reel and ensuring problems don’t occur when it’s most needed. Reel manufacturers encourage owners to carry out basic maintenance and provide instructions for this with each reel. The recommended methods for carrying out daily and seasonal maintenance are well within anybody’s capability and will definitely prolong the life of a reel.

I’ve found many reels will work fine for years but problems can occur, particularly as the reel ages. Problems come from two main areas. The first is caused by general use which often manifests as wear in bearings, gears and other moving parts. The second is caused by the environment and involves saltwater corrosion, line degradation, cosmetic blemishes and paint chips, etc.

What can you do if you discover a problem? I regularly use reel maintenance departments for service support and always have good experiences. There are also specialists who repair and upgrade reels and some can be found through local tackle shops or online.

Nonetheless it can be expensive to send a reel away, particularly for things you can do yourself. Also, if you travel to remote locations some reel knowledge could be invaluable to get you or a mate out of trouble. So if you’re keen the following should give you some basic information to repair and maintain reels yourself.

As reels increase in complexity, the problems of doing the work yourself multiply. Here are a few common mistakes many of us have made:

  • Not having the right tool or using wrong or ill-fitting tools and “butchering” a screw head or other component

  • Breaking something by using too much force or being “ham-fisted”

  • Losing springs and other small parts (often because they fly off as you strip the reel)

  • Being unable to reassemble a reel, or

  • The reel doesn’t work after you reassemble it.

In most cases when this happens you end up scooping up the pile and sending it off to the service department. The good news is that there are a few things you can do to avoid these problems.

The following are guidelines for cleaning complex and delicate things like fishing reels.

  • Strip to a sequence – To access internal workings you have to take the reel apart. Methodically lay parts out in a logical sequence as you remove them. Ice trays are handy for holding small parts. Take your time and refer to the diagram. Take a picture before you proceed with each step so you can check what it should look like. I take notes as I strip a reel for the first time too. Beware of “stored energy” parts like springs and clips. Reassemble the reel in reverse order.

  • Use the right tool correctly – Use the screwdriver or wrench with the snuggest fit and apply force cautiously.

  • Don’t use brute force – Make sure you understand how the part works and is removed. Have you taken out the retaining screw/pin or circlip? Too much force can be disastrous.

  • Use the right cleaner and lube. New materials need specific treatment. Follow manufacturers guidelines when you use cleaners and lubricants.

Before you can pull down a reel you will need a few tools. I have a reel maintenance kit that travels with me and it fits into a kid’s pencil case. The following tools are useful:

  • Screwdrivers. Flat tips and Phillips head in several sizes and in good condition are obligatory. Worn tools will butcher soft bolt heads.

  • Jewellers’ Tool kit. These are actually just really small screwdrivers used for tiny screws, retaining pins etc.

  • Allen keys. A set of both metric and imperial keys will be needed to work on some reels. You may also run into tamper proof bolts which unless you’re really skilled should be sent to the service department.

  • Adjustable wrench. This removes larger bolts. Keep any special tools that come with reels and label them.

  • Needle nose pliers.

  • Bodkin (or probe). This is a small pointy piece of wire for picking things up inside reels and general cleaning tasks. They are also useful on circlips and removing dirt from corners, etc.

  • Tweezers. These are used for a wide range of tasks. Pointy tips are ideal.

  • Cleaning tools. Cotton buds, rags, tooth brush, paint brush, etc.

Having a reel serviced before embarking on a big trip is well advised!

Carrying out maintenance

I mentioned that most reels come with a diagram of their working parts in an “exploded” view. You get one with the reel and can find copies on the net for many models, too. You can also find videos of people carrying out reel maintenance which are useful. Where you need fine detail it’s best to take your own pictures to supplement the diagram.

You need a well-lit work place and I place a towel under the work area so things won’t bounce or ricochet. I use reading glasses for fine work and a swing away magnifying glass for micro work. I clean and service each piece as it comes off the reel. Invariably there are springs and other parts that want to escape when you touch them. If your work area is open plan and cluttered finding these little parts can be a nightmare.

Bearings are subject to heavy use and will degrade the reel’s effectiveness once they’re worn or dirty. I replace bearings with high quality races as in many cases the old bearings aren’t worth saving. You can buy replacement bearings at some specialist retailers.

Metal drag washers should be clean and flat and warped or very worn washers should be replaced. Non-metal washers are wiped clean with a cloth moistened with solvent. If the stack is “wet” washers are re coated with drag grease. For bigger reels capable of serious drag capacity consider replacing old washers with Carbontex washers in the right thickness. You can buy Carbontex sheets online and specific replacement washer kits for many reels.

One way bearings (infinite anti reverse) work best dry and will start to fail if oil or other material gets into them. They can be cleaned with solvent but are fiddly. If this part is playing up and a good clean doesn’t fix the problem, replace it.

Drive gears are also areas of high use and will need a lube. Where work has created movement in these gears you may be able to replace bearings to tighten them up. Eventually a reel will become so worn it will have a lot of play in the drive train. Coat any seals with grease and apply it to the shaft and worm drive surfaces.

Ordering parts can be difficult unless you have the right reel diagram and are certain of the part number. It may be better to send the whole reel away with directions to replace the faulty components. Some problems may also present you with the issue of the cost of repair being close to the replacement cost. I recently sent a threadline away that needed a new anti-reverse bearing and it cost just over half the reel’s purchase price. As the reel was already five years old maybe I should have upgraded instead.

After purchase modifications and upgrades are now quite common. Handles and drag washer upgrades are easy to fit yourself. I’ve fitted several metal handles to spin reels and liked the result. Most modern drags are excellent but after long term wear it may be time to consider an upgrade. I have handled overhead reels fitted with ceramic bearings and the improvement in casting distance and overall smoothness is impressive.

Paint work upgrades are best done by the experts and there are companies that specialise in “pimping” your reel. I have handled a few reels with new paint work and they look great. Line management should be part of any maintenance program. Replace monofilament at least annually and test braid for degradation regularly. In worn braid an over hand or “granny” knot will break when snapped tight. If in doubt, replace.

Prevention

Daily maintenance will help postpone the big expenses that come through long term wear. The aim is to remove saltwater residue without forcing water into bearings and internal mechanisms. Mist or lightly rinse reels after every trip with clean water and wipe down reels and let dry. For many reels using sudsy warm water will be okay, but avoid detergent in anything with magnetic oil or similar. Keep lube around bail rollers, bail arms and handle assemblies and loosen off drags if they aren’t being used for a while.

Spraying reels with commercial cleaning products is workable but again be aware of those reels with magnetic oil technologies. Preventative measures can be worthwhile. I know a few anglers who treat screws and bolts with a product like Duralac to reduce electrolysis. They also spray their reels with a silicon compound, which when dry, provides further defence against corrosion.

Good quality reels come with a warranty. Take the time to register and retain your receipt as proof of purchase. While a warranty won’t cover everything I have found high end reels that develop a problem will get prompt service from the relevant company particularly if you enclose a copy of the receipt along with a letter outlining the problem.

A full pulldown is rarely required unless your reel goes in for swim or you want to replace bearings. An annual clean, lube and inspection will suffice for most reels. Also, because I have heaps of reels I keep a record which shows service dates and line fills for each.

All reels will wear over time and even the most expensive models will degrade. A basic daily, seasonal and annual maintenance program will ensure you get many years out of them. Basic skills and a tool kit will also get you back into the game when unexpected problems arise.

Big Snapper Tactics

Big Snapper Basics – Bait, Berley, Dawn/Dusk

The author, Paul Lennon, with a 14.6kg NSW record red caught in less than 10m of water.

The author, Paul Lennon, with a 14.6kg NSW record red caught in less than 10m of water.

Bait fishing for snapper is such a rewarding method, but it has still managed to find the backseat over the past decade due to soft plastic lures and slow jigs.  Many anglers have never tried or have forgotten how to use bait for snapper and these anglers are missing out on one of the most thrilling and successful forms of fishing.

It’s something I do a lot of and while it’s still a common style of fishing, there are a lot of mistakes and things you can do wrong that pretty much instantly write off your chances of having success.

The number one hard rule is that snapper are not a gentleman’s hours fish; if you’re not prepared to be out there before the sun comes up or to be coming home in the dark then you will miss the prime time.

When it comes to fishing the shallow reefs in 10-30m of water dawn, dusk periods are critical and when 80% of snapper are caught. If you’re serious, get there well before the prime time, so you’ll be anchored up and in position. This will give any reds spooked by your presence time to readjust and you can get a good berley trail going; this is something snapper respond very well to.

pilchard-cubing.jpg

A few blocks of pilchards cubed up and a handful thrown over every few minutes is all it takes. This will in turn attract plenty of baitfish around the boat, which will further amplify the berley’s effectiveness.

Position yourself up current of the area you want to fish; it’s no good anchoring on one side of a ledge or bommie if the current is going to wash your berley away from where you’re casting.

With the berley going the right way snapper can often be whipped into a frenzy with baits often getting smashed immediately after hitting the water.

I find the best baits to use are fresh squid, cuttlefish, pilchards and slimy mackerel fillets. It’s important to make this bait look as natural as possible and also to have it wafting down through the water column around the same speed as the berley.

This is another common mistake anglers make as they fish sinkers way too heavy for snapper in this depth of water. If you can get away with it, a totally unweighted bait is all you need, however depending on current you may have to go up to a pea-size sinker. This allows the bait to slowly work its way down the water column and if there’s no action within five minutes of casting, wind up and throw out again.

The perfect hook for this is the Black Magic C points in a 5/0-6/0 depending on bait size. These hooks aren’t too big to catch pan-sized snapper, but strong enough to hang onto that 20-pounder too. They are also the only hook I’ve used on snapper that consistently penetrate through the super-hard top jaw molars – an area that for most hooks usually results in a bent tip and no fish.

The best areas to target big reds in the shallows are usually super nasty terrain and getting steamrolled by the odd big fish is something you’ve just got to deal with. If you go too heavy, you won’t get the bite and if you go too light, you’re going to get blown away just about every time. I find a good compromise for bait fishing is 30lb braid with 30lb leader. This will give you a good cast and keep you in the game when that trophy fish comes along.

I use Black Magic 30lb Fluorocarbon leader as its abrasive resistance is as good as it gets and it’s able to deal with being scuffed through the reef far more than other softer leader lines.

The ideal outfit is a 5000-6000 size reel paired with a 7ft rod rated 20-30lb with plenty of grunt to try and put the breaks on these things before they find the reef.

This article was published in www.fishingmonthly.com.au

© Copyright 2018 Black Magic Tackle Ltd. All rights reserved.

Gear up for snapper

Gear up for snapper

MODERN technology has undoubtedly offered the angling scene its fair share of innovations capable of improving success rates for certain target species. And whilst it’s fantastic to have this type of information and equipment available at our fingertips, sometimes these advancements can pose more of a headache than a blessing, particularly for the more novice fisho looking to broaden his or her horizons.

Read more at http://www.fishingworld.com.au/how-to/gear-up-for-snapper